Composition of an Electron application
In Electron, there are 2 separate environments that we should know:
-
Main process is used as the entry point of our application. It runs in a Node.js environment, meaning it has the ability to
requiremodules and use the Node.js API. Its purpose is to handle the creation ofBrowserWindow, control the application lifetime usingappmodule from Electron and access custom APIs from Electron to interact with the user's operating system. -
Renderer process is spawned by the main process and is used to render visually the web content. Code ran inside a renderer process is exactly the same as code ran in a browser, so it should behave according to web standards and use the same tools and paradigms that you use on the web, outside of Electron.
However, we need to communicate between the two processes. This can be achieved using IPC (inter-process communication), which is a mechanism that allows us to send messages with data between processes.
Preload scripts
We can use the preload script to communicate between the two processes. Preload script contains code that will be executed in the renderer context, before its web content starts loading.
This script is actually ran within the renderer context but is granted more privileges by having a direct access to Node.js APIs.
You can declare a preload script when creating a BrowserWindow in your main process:
const win = new BrowserWindow({
  webPreferences: {
    preload: 'path/to/preload-script.js',
  },
})
Context-bridge with preload scripts
Let's introduce contextBridge module from Electron which allows us to declare custom properties on the Window object for the renderer context.
Preload scripts shares the same Window property as the renderer context, however due to context isolation you cannot directly extend the Window object without using contextBridge from Electron module for security reasons.
Context Isolation means that preload scripts are isolated from the renderer's main world to avoid leaking any privileged APIs into your web content's code.
Simple failing example without using contextBridge:
// preload.js
window.api = {
  hello: 'world',
}
// renderer.js
console.log(window.api.hello) // undefined
However, when using contextBridge we can propertly extend the Window object and access those properties from the renderer context:
// preload.js
const { contextBridge } = require('electron')

contextBridge.exposeInMainWorld(
  // Namespace inside the `Window` object where you want to extend properties.
  'api',
  // Your properties.
  { hello: 'world' }
)
// renderer.js
console.log(window.api.hello) // "world"
This feature is mostly used to expose the ipcRenderer helpers to the renderer context (inter-process communication).
IPC example with a preload script
Here is a full example of a preload script that uses IPC to read a file from the user's file system and display its content to the renderer process:
electron-basic-example/
├─ file-to-read.txt
├─ package.json
├─ main.js
├─ preload.js
├─ index.html
# file-to-read.txt
Hello, World!
// package.json
{
  "name": "electron-basic-example",
  // Don't forget to set this! Electron will look for this file to start the app.
  // It should point to your entry-point of your main process.
  "main": "main.js",
  "scripts": {
    "dev": "electron ."
  },
  "devDependencies": {
    "electron": "^17.1.2"
  }
}
// main.js
const fs = require('fs')
const path = require('path')
const { BrowserWindow, app, ipcMain } = require('electron')

// Create a basic Electron `BrowserWindow` with a preload script.
const createWindow = () => {
  const win = new BrowserWindow({
    webPreferences: {
      preload: path.join(__dirname, 'preload.js'),
    },
  })

  win.loadFile('index.html')
}

app.whenReady().then(() => {
  console.log('main: app is ready, creating window.')

  createWindow()

  // Create a listener for the "read-file" event.
  // When received, try to read file content from "file-to-read.txt" and send
  // the result back to the renderer process (`event.sender.send("read-file-success")`).
  ipcMain.on('read-file', (event) => {
    console.log('main: received read-file event.')

    const fileContent = fs.readFileSync('./file-to-read.txt', { encoding: 'utf-8' })

    console.log('main: file-content is:', fileContent)

    event.sender.send('read-file-success', fileContent)

    console.log('main: sent read-file-success event.')
  })
})
// preload.js
const { contextBridge, ipcRenderer } = require('electron')

contextBridge.exposeInMainWorld('api', {
  // Expose a `window.api.readFile` function to the renderer process.
  readFile: () => {
    // Send IPC event to main process "read-file".
    ipcRenderer.send('read-file')

    // Create a promise that resolves when the "read-file-success" event is received.
    // That even is sent from the main process when the file has been successfully read.
    return new Promise((resolve) =>
      ipcRenderer.once('read-file-success', (event, data) => resolve({ event, data }))
    )
  },
})
<!-- index.html -->
<!DOCTYPE html>
<html lang="en">
  <head>
    <meta charset="UTF-8" />
    <meta http-equiv="X-UA-Compatible" content="IE=edge" />
    <meta name="viewport" content="width=device-width, initial-scale=1.0" />
  </head>

  <body>
    <button id="button">Click me to read file</button>

    <p>File content is: <span id="file-content"></span></p>

    <script>
      document.getElementById('button').addEventListener('click', () => {
        // Call the exposed function from the preload script.
        window.api
          .readFile()
          // Attach a `.then` event since we made it a promise that returns data.
          .then(({ event, data }) => {
            console.log('renderer: event is:', event)
            console.log('renderer: data received is:', data)

            // Replace the content of the `<span>` element with the received data.
            document.getElementById('file-content').innerText = data
          })
      })
    </script>
  </body>
</html>
After copying the files, run the following commands to bootstrap the app:
npm install
npm run dev
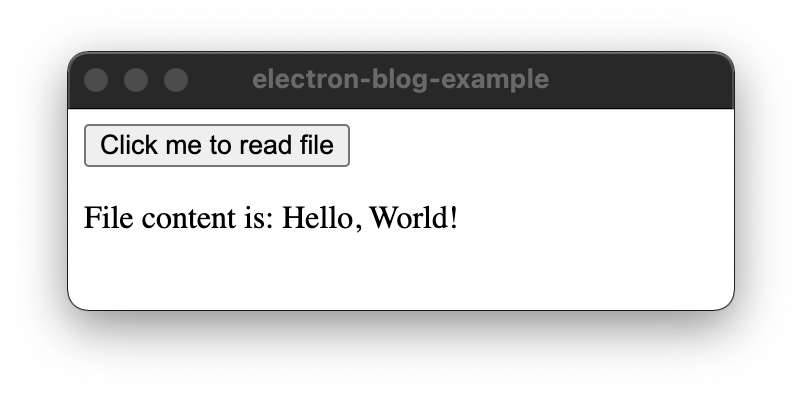
You should see the following output after clicking the button:
